


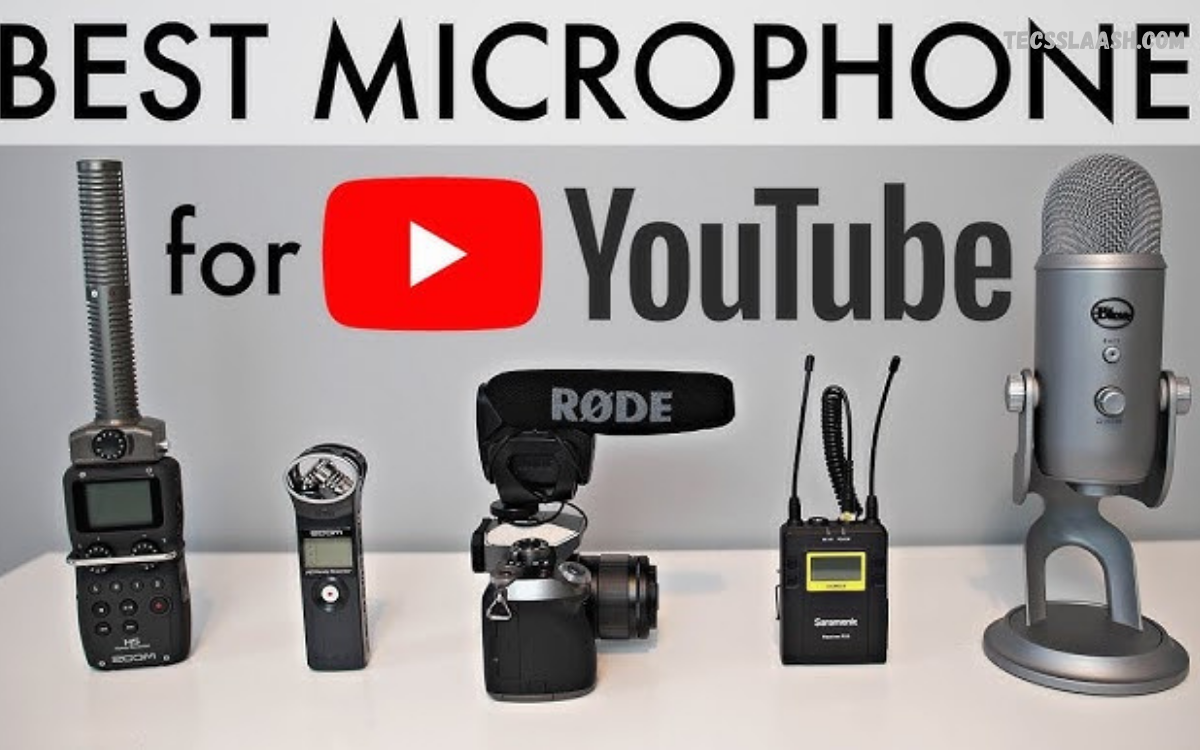
Choosing the best microphone for YouTube can dramatically improve the quality of your videos. Viewers may tolerate average lighting or basic camera quality, but unclear, distorted, echo-filled audio can quickly make content difficult to watch. A suitable microphone delivers clean vocals, balanced frequencies, reduced background noise, and a more professional presentation.
The right microphone depends on your content format, recording environment, budget, and production workflow. Desk-based creators may prefer USB or hybrid microphones, while vloggers can benefit from wireless lavalier or shotgun microphones.
Why Microphone Quality Matters for YouTube
Audio quality directly affects how professional a YouTube video feels. A high-quality microphone captures speech with better clarity and consistency, allowing viewers to understand every word without increasing their device volume.
Microphone quality becomes particularly important when videos contain long conversations or voice-over sections. A recording with excessive room echo, keyboard noise, fan noise, clipping, or inconsistent volume can distract viewers from the actual content.
What Is the Best Microphone for YouTube?
There is no universal microphone that works perfectly for every YouTube creator. A creator recording tutorials at a desk has different requirements from someone filming travel videos, interviews, gaming streams, product reviews, or outdoor content. The Best Microphone for YouTube should match the recording environment and production style rather than simply having the highest price.
For many beginners, a dynamic USB/XLR microphone is a strong starting point because it combines straightforward connectivity with future upgrade flexibility. Current 2026 microphone guides commonly highlight models such as the Samson Q2U, Maono PD200X, RØDE PodMic USB, Shure MV7+, and Shure SM7dB across different price categories.
USB Microphones for YouTube
USB microphones are among the easiest choices for new YouTube creators. The microphone connects directly to a computer, eliminating the immediate need for an external audio interface. This makes USB models convenient for tutorials, gaming videos, voice-overs, livestreams, podcasts, and desk-based content.
A USB microphone can provide excellent recording quality without requiring extensive audio-engineering knowledge. Creators can connect the microphone, select it inside their recording software, adjust input gain, and begin recording. For solo creators who value simplicity, USB remains one of the most practical microphone connection options.
XLR Microphones for YouTube
XLR microphones are designed for more advanced recording systems. Instead of connecting directly to a computer, an XLR microphone normally connects to an audio interface or mixer. The interface provides preamplification and converts the analog microphone signal into digital audio for recording.
This configuration provides greater flexibility for creators who expect their production setup to grow. Multiple microphones, external processing, professional interfaces, and advanced monitoring can be integrated into an XLR workflow. The trade-off is additional equipment, cables, setup complexity, and cost.
USB vs XLR: Which Is Better?
USB is usually better for beginners who want a fast and uncomplicated setup. It reduces the number of components required and makes troubleshooting easier. For a solo YouTuber recording directly into a laptop or desktop computer, a good USB microphone can deliver excellent results without requiring an audio interface.
XLR becomes more attractive when a creator needs multiple microphones, detailed gain control, professional interfaces, or a scalable recording system. Hybrid USB/XLR microphones provide another practical solution because they allow creators to start with USB and transition to an XLR interface later.
Dynamic vs Condenser Microphones
Dynamic and condenser microphones behave differently, making the choice important for YouTube recording. Dynamic microphones generally have lower sensitivity and can reject more unwanted environmental sound when positioned close to the speaker. This characteristic makes them particularly useful in bedrooms, offices, gaming rooms, and other untreated spaces.
Condenser microphones are typically more sensitive and can capture detailed vocal characteristics. They can perform exceptionally well in controlled recording environments, but their sensitivity may also capture room reflections, computer fans, air conditioning, and other background sounds. Room acoustics should therefore influence your microphone decision.
Best Microphone for YouTube in a Noisy Room
A dynamic microphone is often a strong choice for creators working in an untreated or moderately noisy room. Keeping the microphone close to your mouth allows the desired voice signal to dominate over distant environmental sounds. This technique can produce cleaner dialogue without requiring an expensive studio.
Room treatment still matters. Closing windows, reducing fan noise, moving away from reflective surfaces, using curtains or soft furnishings, and controlling microphone distance can significantly improve results. Spending more money on a sensitive condenser microphone does not automatically solve acoustic problems.
Best Microphone for YouTube Beginners
Beginners should prioritize simplicity, reliability, compatibility, and value. A microphone that is easy to connect and position is usually more useful than an advanced model requiring extensive technical knowledge. USB microphones are particularly attractive because they can provide a complete recording solution with minimal additional hardware.
A hybrid microphone can be an even better long-term investment for creators planning channel growth. Models offering both USB and XLR connectivity allow a creator to begin with direct computer recording and later connect the same microphone to an audio interface. Current buyer guides identify microphones such as the Samson Q2U and Shure MV7+ as examples of this flexible approach.
Best Budget Microphone for YouTube
Budget-conscious creators do not need to spend hundreds of dollars to achieve useful recording quality. Affordable microphones can produce clear speech when properly positioned and used in a reasonably controlled environment. The Samson Q2U is frequently highlighted as a budget-friendly USB/XLR dynamic option, while models such as the FIFINE K669B target beginners who primarily need USB connectivity.
The most important consideration at this price level is avoiding poor placement. Even an inexpensive microphone can sound significantly better when positioned close to the speaker and aimed correctly. Conversely, an expensive microphone placed too far away in an echo-heavy room may produce disappointing results.
Best Microphone for YouTube Gaming
Gaming creators need a microphone capable of delivering clear speech while handling keyboard clicks, mouse movements, computer fans, game audio, and enthusiastic commentary. A dynamic microphone can be advantageous because its close-working technique helps reduce unwanted room sound.
A USB microphone is convenient for gaming because it can connect directly to a computer. Creators who already use an audio interface may prefer an XLR microphone for greater control. A boom arm is also useful because it positions the microphone close to the mouth without consuming valuable desk space.
Best Microphone for YouTube Voice-Over
Voice-over recording benefits from microphones that produce articulate speech and controlled proximity response. A condenser microphone can work exceptionally well in a treated or quiet room because its sensitivity can capture detailed vocal characteristics. A dynamic microphone can be preferable when the recording environment contains noticeable background noise.
Microphone distance should remain consistent throughout the recording. Moving closer and farther from the capsule can create noticeable volume and tonal changes. A stable microphone position, controlled speaking technique, and appropriate gain level often matter more than small differences between similarly priced microphones.
Best Microphone for YouTube Vlogging
Vloggers require a different microphone strategy because the recording position constantly changes. A desktop USB microphone is impractical when the creator is walking through a city, traveling, filming outdoors, or recording handheld footage. Wireless lavalier systems and compact camera-mounted microphones are more appropriate.
Modern wireless microphone systems increasingly provide features such as onboard recording, compact transmitters, noise reduction, USB-C connectivity, and long operating ranges. Current 2026 guides highlight systems such as DJI Mic 3, RØDE Wireless GO Gen 3, Hollyland Lark A1, and other wireless options for mobile content creation.
Best Wireless Microphone for YouTube
Wireless microphones offer creators greater freedom of movement. A transmitter can be attached to clothing while the receiver connects to a camera, smartphone, or computer. This configuration is especially useful for interviews, tutorials, presentations, travel videos, outdoor content, and multi-person recordings.
When choosing a wireless microphone, examine transmission reliability, battery life, recording backup, connector compatibility, range, noise reduction, and physical size. Onboard recording can be particularly valuable because it provides a backup copy if the wireless connection experiences interference or unexpected problems.
Best Microphone for YouTube Interviews
Interviews require special attention because multiple speakers must be recorded clearly. A single desk microphone may not be appropriate when participants sit far apart. Wireless lavalier microphones, handheld microphones, or multiple XLR microphones can provide more consistent results.
For professional interview production, XLR systems offer significant flexibility because separate microphones can be routed through an audio interface or mixer. Wireless systems can be more practical for mobile interviews because they reduce cable clutter and allow subjects to move naturally.
Best Microphone for YouTube Podcasts
Podcast-style YouTube videos benefit from microphones designed for close speech. Dynamic broadcast microphones are popular because they can produce a focused vocal sound while reducing the amount of room ambience captured. A microphone mounted on a boom arm also makes it easier to maintain consistent distance.
Creators should consider whether they need USB, XLR, or both. USB simplifies a one-person podcast, while XLR provides better scalability for multiple hosts. Hybrid microphones offer a practical compromise for creators who want simple operation today and a more advanced setup later.
Best Microphone for YouTube Cameras
Camera-mounted microphones are useful when the microphone cannot remain close to the speaker. Shotgun microphones can provide directional pickup and are commonly used for filmmaking, product demonstrations, interviews, and vlogging. However, microphone placement remains important because even a directional microphone can produce weak audio when positioned too far from the subject.
A compact shotgun microphone can also be useful when the camera needs to remain lightweight. For professional productions, a dedicated boom microphone positioned close to the speaker can often provide better results than relying exclusively on a camera-mounted microphone.
Polar Patterns Explained
Polar patterns describe how a microphone responds to sound arriving from different directions. Cardioid microphones primarily emphasize sound from the front while reducing sensitivity from the rear. This pattern is useful for solo YouTube creators because the microphone can focus on the speaker while reducing some unwanted sound behind it.
Other patterns can be useful for specialized recording situations. Omnidirectional microphones capture sound from multiple directions and can work well for certain lavalier applications. Supercardioid and shotgun designs provide more directional pickup for specific production scenarios. Selecting the correct polar pattern helps match the microphone to the recording environment.
Microphone Placement Matters
Microphone placement can influence recording quality as much as microphone selection. For many close-mic applications, positioning the microphone relatively near the mouth improves the ratio between direct voice and room sound. However, extremely close placement can increase bass through the proximity effect and make plosive sounds more noticeable.
Experiment with distance while monitoring your voice through headphones. The ideal position should provide clear speech without excessive bass, breath noise, pops, or distortion. Maintaining a consistent position also creates more uniform audio across an entire video.
Gain and Recording Levels
Gain controls how strongly the microphone signal is amplified before recording. Too little gain produces a quiet recording that may require significant boosting during editing. Excessive gain can cause clipping and distortion that cannot be completely repaired afterward.
Set recording levels conservatively and leave sufficient headroom for louder speech. Test your loudest expected speaking volume before beginning the main recording. Monitoring through headphones can reveal clipping, hum, interference, and unwanted background noise before these problems become part of the final video.
Pop Filters and Windscreens
Plosive sounds occur when strong bursts of air from consonants such as “P” and “B” reach the microphone capsule. A pop filter or suitable windscreen helps reduce these sudden bursts. This accessory is inexpensive but can make vocal recordings sound substantially cleaner.
Outdoor creators need additional wind protection. Wind can overwhelm a microphone capsule and produce severe low-frequency rumble. Foam covers, furry windshields, and specialized outdoor protection can reduce this problem depending on the microphone design and filming conditions.
Read Also: Best Video Editing Apps for Creators 2026
Boom Arms and Microphone Stands
A boom arm can improve microphone positioning while keeping the desk clear. It allows creators to place the microphone at an appropriate height and distance without forcing it to occupy the center of the workspace. This is particularly useful for gaming, streaming, podcasting, and tutorial recording.
A stable stand is equally important for creators who do not need a boom arm. The microphone should remain secure and should not transmit excessive vibrations from the desk. Shock mounts can further isolate the microphone from bumps, keyboard vibrations, and accidental contact.
Headphones for Monitoring
Headphones are essential for identifying problems that may not be obvious through speakers. Monitoring allows creators to hear background hum, excessive room echo, mouth noises, clipping, cable interference, and changes in microphone distance.
Closed-back headphones are commonly useful during recording because they reduce the chance of microphone pickup from headphone playback. Monitoring at a moderate volume also makes it easier to concentrate on the actual recording rather than becoming distracted by excessive sound levels.
How to Reduce Background Noise
Background noise can originate from air conditioners, fans, computers, traffic, appliances, keyboards, and nearby conversations. Start by removing or reducing the source before attempting to fix everything during post-production. Physical control is usually more reliable than aggressive software processing.
Microphone placement also helps. Position the microphone away from obvious noise sources and keep it close to the speaker. Recording at appropriate gain levels prevents unnecessary amplification of quiet environmental sounds. Dynamic microphones can be particularly useful in challenging rooms because of their close-working characteristics.
How to Reduce Echo in YouTube Videos
Room echo occurs when sound reflects from hard surfaces such as walls, floors, windows, desks, and ceilings. Empty rooms tend to produce stronger reflections than spaces containing curtains, carpets, furniture, books, and other sound-absorbing materials.
You do not necessarily need a professional studio to improve room acoustics. Soft furnishings, curtains, rugs, strategically positioned acoustic panels, and careful microphone placement can reduce reflections. The objective is to create a more controlled recording environment rather than simply buying a more expensive microphone.
Microphone Frequency Response
Frequency response describes how a microphone captures different frequencies. Human speech primarily occupies the midrange, but low and high frequencies influence warmth, presence, clarity, and intelligibility. Two microphones can therefore sound different even when both provide technically accurate recordings.
Do not choose a microphone solely because it has a particular frequency-response specification. Your voice, microphone distance, room acoustics, and processing chain all affect the final sound. Listening to real recordings of the microphone with voices similar to yours can provide more useful information.
Choosing a Microphone by Budget
A sensible microphone budget should account for the complete recording system rather than the microphone alone. A creator may also need a boom arm, stand, pop filter, headphones, cables, audio interface, or acoustic improvements. Spending the entire budget on the microphone can leave important supporting equipment neglected.
Entry-level creators can focus on reliable USB microphones. Intermediate users can consider hybrid USB/XLR microphones, while advanced creators may benefit from professional XLR microphones and quality interfaces. The best investment is the one that addresses the current limitation in your production workflow.
Common Microphone Buying Mistakes
One common mistake is choosing a microphone based entirely on popularity. A microphone that performs beautifully in a treated studio may not be ideal for a noisy bedroom. Another mistake is buying a highly sensitive condenser microphone for an untreated room without addressing echo and background noise.
Creators also frequently underestimate microphone placement. Moving a microphone several inches farther away can change the recording substantially. Buying increasingly expensive equipment without improving placement, room acoustics, gain staging, and recording technique can result in diminishing returns.
How to Set Up the Best Microphone for YouTube
Start by placing the microphone at a comfortable speaking position. Keep the capsule aimed correctly toward your mouth and maintain a consistent distance. Connect the microphone through USB or XLR according to your system, then select the correct input inside your recording software.
Perform a test recording before filming the complete video. Listen for clipping, background noise, echo, plosives, and unwanted handling sounds. Adjust microphone position and gain before adding software processing. This simple workflow prevents many common audio problems.
Best Microphone Settings for YouTube
There is no universal microphone setting that works for every voice. Start with conservative input gain and adjust it according to your natural speaking volume. Avoid pushing the input so high that loud words approach digital clipping.
During editing, light processing can improve consistency. A high-pass filter may reduce unnecessary low-frequency rumble, compression can control dynamic range, and gentle equalization can improve clarity. Processing should enhance an already good recording rather than attempt to rescue severely damaged audio.
Should You Buy an Expensive Microphone?
An expensive microphone can provide meaningful improvements, but price alone does not guarantee better YouTube audio. A premium microphone placed poorly in a reflective room can sound worse than an affordable microphone positioned correctly in a controlled environment.
Invest in premium equipment when you have identified a genuine limitation. If your current microphone produces noise, distortion, weak connectivity, or inadequate flexibility, an upgrade makes sense. If your main problem is room echo or inconsistent placement, addressing those issues first may deliver a larger improvement.
Recommended Microphone Types for Different Creators
Desk-based YouTubers should consider USB or USB/XLR dynamic microphones when recording in ordinary rooms. Voice-over creators working in quiet spaces can explore USB or XLR condenser microphones for detailed vocal capture. Gaming creators often benefit from close-positioned dynamic microphones with convenient USB connectivity.
Vloggers and mobile creators should consider wireless lavalier systems or compact shotgun microphones. Interview creators can select dual wireless systems or multiple XLR microphones depending on production requirements. Podcast creators should prioritize close-talk dynamic microphones and reliable monitoring.
Frequently Asked Questions
What is the best microphone for YouTube?
The best microphone depends on your content and recording environment. A USB/XLR dynamic microphone is a versatile choice for many beginners and intermediate creators, while wireless microphones suit mobile video production.
Is USB or XLR Better for YouTube?
USB is easier for beginners because it connects directly to a computer. XLR offers greater flexibility and scalability through an audio interface. Hybrid USB/XLR microphones provide both connection options.
Is a Dynamic or Condenser Microphone Better?
Dynamic microphones are often preferable for untreated or noisy rooms. Condenser microphones can deliver detailed recordings in quiet, acoustically controlled environments.
Do You Need an Expensive Microphone for YouTube?
No. An affordable microphone can produce excellent results when positioned correctly. Room acoustics, microphone distance, gain, and recording technique can have a major impact on final audio quality.
What Microphone Is Best for YouTube Gaming?
A close-positioned dynamic USB microphone is a practical choice for gaming creators. It can provide clear commentary while reducing some environmental sounds compared with highly sensitive microphones.
What Microphone Is Best for YouTube Vlogging?
Wireless lavalier systems and compact shotgun microphones are generally more suitable for vlogging than desktop microphones. Wireless systems provide freedom of movement, while shotgun microphones can mount directly to compatible cameras.
Should a YouTube Microphone Have USB and XLR?
USB/XLR connectivity can be valuable for creators who expect their setup to grow. USB provides simple recording today, while XLR allows future integration with an audio interface or mixer.
Do You Need a Pop Filter?
A pop filter or windscreen can reduce plosive sounds caused by strong bursts of air. It is especially useful for close-up vocal recording and voice-over work.
How Far Should a YouTube Microphone Be From Your Mouth?
The ideal distance varies by microphone design and voice. Many close-talk microphones perform well when positioned relatively near the mouth, but creators should test distance to balance clarity, bass response, plosives, and room sound.
Can a Good Microphone Improve YouTube Videos?
Yes. Clear audio can make videos easier to understand and more professional. However, microphone quality should be combined with proper placement, room control, appropriate gain, monitoring, and thoughtful post-production.
Conclusion
The Best Microphone for YouTube is not necessarily the most expensive model available. The right choice depends on your room, content format, microphone distance, connection preference, mobility requirements, and future production plans.
For creators recording in untreated rooms, dynamic microphones are often a practical choice because close positioning can reduce the impact of environmental noise. For controlled rooms, condenser microphones can provide detailed vocal reproduction.

